

Table of Contents
Update to the latest cloud navigation.
As a result of increasing projects, here is a little how-to with the summary of my previous articles. The main points are:
- Azure AD Seamless Single Sign-On (PTA / PHS)
- SAML Authentication (Azure AD as IdP & Citrix Gateway as SP)
- Citrix Federated Authentication Service (FAS)
- Microsoft Azure Multi-Factor-Authentication with Conditional Access
Requirements
- Fully working Citrix Virtual Apps and Desktop Environment (StoreFront & DDC Minimum Version 7.9)
- NetScaler with successful base configuration & activated Enterprise or Platinum license (Minimum Version 12.1 Build 50+ for native workspace app, for browser Minimum Version 11.1)
- Configured Unified Gateway vServer
- Internal and external DNS entries for Unified Gateway vServer (e.g. citrix.deyda.net)
- Certificates for DNS entries (wildcard certificates are the easiest)
- Existing Azure Tenant with Azure-AD base configuration (Domain, AAD Sync) & activated Azure AD Premium license
- AD Connect version installed and configured (Minimum Version 1.1.644.0)
- Firewall release for *.msappproxy.net on port 443
- Domain administrator credentials for the domains that connected to Azure AD via AD Connect
- Installed Authenticator App on Test User Mobile Phone
Azure AD Seamless SSO (PTA / PHS)
You can find more detailed background information on this topic here.
Activation Seamless SSO – AD Connect
I will now show you how to enable Pass-through Authentication and Password Hash Synchronization. Only one feature is needed to use Seamless SSO.
Activating Pass-through Authentication
To enable Pass-through Authentication, connect to the AD member on which AD Connect is installed.
- Start Azure AD Connect

- Click on Configure in the Welcome Screen

- Now click on Change user sign-in and confirm this with Next

- Enter the credentials of the Global Administrator and confirm the entry with Next

- Possibly another login mask is requested because of an MFA

- Select Pass-through authentication and then Enable single sign-on. Confirm with Next

- Under Single single-on click on Enter credentials

- In the following windows, enter the credentials of a local domain administrator and click OK

- Click on Configure to perform the described actions

- Confirm the successful execution in the Configuration complete window with Exit

Activating Password Hash Synchronization
To activate Password Hash Synchronization connect to the AD member on which AD Connect is installed.
- Start Azure AD Connect
- Click on Configure in the Welcome Screen
- Now click on Change user sign-in and confirm this with Next
- Enter the credentials of the Global Administrator and confirm the entry with Next
- Possibly another login mask is requested because of an MFA
- Select Password Hash Synchronization and then Enable single sign-on
- Confirm with Next

- Under Single single-on click on Enter credentials

- In the following windows, enter the credentials of a local domain administrator and click OK

- Click on Configure to perform the described actions

- Confirm the successful execution in the Configuration complete window with Exit

Local Active Directory
In the local Active Directory, you can now find a new computer object called AZUREADSSOACC. This object should be protected from deletion.

Azure Portal
In the Azure Portal you can also see the activated Seamless SSO methods.
- Log in to the Azure Portal with administrative credentials

- In the Azure Portal, click on Azure Active Directory > Azure AD Connect

- Then click on Azure AD Connect

- Click on Connect Sync in AAD Connect

- Now click on the Seamless SSO method (Seamless single sign-on or Pass-through authentication) that has been enabled via Azure AD Connect

Under Seamless single sign-on, domains enabled with Password Hash Synchronization can be checked.

For Pass-through authentication, a warning icon is displayed because the agent is stored on only one server.

According to Microsoft, this will be distributed over 3 internal servers.

Group Policy Object
In order for Seamless SSO to work on the end devices, some settings still have to be distributed via GPOs.
- Connect to a computer that has the Group Policy Management Console installed.

- Now adds the following settings to an existing or a new GPO

- Edit the Site to Zone Assignment List with the following values
| Value Name | Value |
|---|---|
| login.microsoftonline.com | 3 |
| aadg.windows.net.nsatc.net | 1 |
| autologon.microsoftazuread-sso.com | 1 |
| secure.aadcdn.microsoftonline-p.com | 1 |
Note:
If Seamless SSO is to be disabled for individual groups or users, the GPO must be turned to the Value 4 for these people.

- Then go to the path User / Computer Configuration > Adminstrative Templates > Windows Components > Internet Explorer > Internet Control Panel > Security Page > Intranet Zone

- Set the Allow updates to status bar via script entry to Enabled

Renew the Kerberos Decryption Key
Microsoft recommends rolling out the Kerberos Decryption Key at least every 30 days. This reduces the risk of spying on the Kerberos Decryption Key. Microsoft is working on the introduction of an automated function to perform this task.
To renew the Kerberos Decryption Key of the AZUREADSSOACC computer account, you must first download the Azure AD PowerShell module from the PowerShell Gallery.
- Start PowerShell as the administrator on the computer on which AD Connect is installed and run the following command:
|
1 |
Install-Module MSOnline |

- Navigate to the path C:\Program Files\Microsoft Azure Active Directory Connect and import the module AzureADSSO.psd1

- Execute the New-AzureADSSOAuthenticationContext command

- Enter the credentials of an Azure administrator in the following window.

- Then run Get-AzureADSSOStatus. This checks which domains are stored and activated in the Seamless SSO tenant.

- Then run the command $passwd = Get-Credential and enter the credentials of a local domain administrator in the following window.

- Finally, executes the following command to complete the update of the Decryption Key of the AZUREADSSOACC computer account.
|
1 |
Update-AzureADSSOForest -OnPremCredentials $passwd |

This must be done for all domains configured for Seamless SSO.
SAML Authentication (Azure AD as IdP & Citrix Gateway as SP)
You can find more detailed background information on this topic here.
Active Directory
If you do not use the same UPN in Azure AD and in the local Active Directory, you still have to adjust it.
- To do this, open the Active Directory Domains and Trusts tool.

- In the tool, right-click on the top item (Active Directory Domains and Trusts) and select Properties.

- In the following window enter the desired domain (e.g. deyda.net) under Alternative UPN Suffixes and confirm the entry via Add
- Check that the domain name has been inserted correctly and confirm with OK

- Now you can bulk edit or manually adjust the UPN of the required users to the Azure-AD domain

Azure Active Directory
To connect our upcoming Service Provider, we now need to create a Enterprise application in the Azure Active Directory.
- To configure the Azure Active Directory, log in to Azure Portal
- In the Azure Navigation Panel, we click on Azure Active Directory.

- And click above on Create your own application

- In the following window enter the Name of the Enterprise app and select the checkbox next to Integrate any other application you don’t find in the gallery (Non-gallery)
- Confirm with Create

- Wait for the application to be created. Information can be obtained from the Notifications element at the top

- After successful creation of the application, you will be redirected to the Overview page of the application.

- If this does not happen, simply go to Azure Active Directory > Enterprise applications > All applications, find the new application you just created (e.g. CVAD) and click on it

- In the Enterprise application click on Single sign-on or 2. Set up single sign on

- Under Select a single sign-on method click on SAML

The following window configures the communication between the Identity Provider and Service Provider.

- Click on the pencil icon in the upper area with the number 1 to edit the Basic SAML Configuration.

- Enter here the following:
- Confirm your input with Save

Note !
The fields under Identifier and Reply URL appear only after clicking the Add identifier / Add reply URL links.

- The settings under point 2 Attributes & claims can remain in the existing standard

Note !
The settings in Attributes & Claims can be edited if not the Azure AD UPN should be passed to the local environment, but an alternative attribute should be used by storing the local login name.
- Under SAML Signing Certificate (Item 3), download the Certificate (Base 64) for the Service Provider (NetScaler)
Note !
The NetScaler can also be configured via Metadata URL, in the Enterprise Application this is called App Federation Metadata Url. Since I personally had only problems with it, I recommend the manual method described here.

Note !
The SAML Signing Certificate is valid for 3 years and must be renewed in time. Instructions can be found under Renewing the SAML Certificate.

- From area 4 (Set up OnPrem CVAD), copy the displayed URLs (Login URL, Azure AD Identifier & Logout URL) to a local file

To allow users to use SAML authentication for Citrix, they must be assigned to the application.
- Click on Users and groups.

- Now click on Add user/group

- Now select from the list the users who should be granted access (or select all users) and confirm this with Assign.

- I only authorised one test user (Test User 01) for this

NetScaler
Finally, the NetScaler (Citrix ADC) must be configured to communicate with the Identity Provider (Azure-AD).

- To do this, we log in to the Admin web interface of the NetScaler and navigate to Traffic Management > SSL > Certificates > Server Certificates.

- There, click Install to import the previously downloaded certificate of the enterprise app

- Enter the following and confirm the entry with Install

- The installed certificate can not be found under Server or Client Certificates, but under Unknown Certificates

- Then we navigate to Security > AAA – Application Traffic > Virtual Servers to create the SAML Authentication Policy and Authentication vServer

- Under Authentication Virtual Servers, click Add to create a new vServer

- Now enter the following:
- Click on OK

- In the following wizard click on No Server Certificate to connect your server certificate (not the IdP certificate !)

- Click in the Click to select area

- Select your NetScaler Server certificate (e.g. Wildcard certificate) and click Select

- Click on Bind

- If the certificate is attached (1 Server Certificate) click Continue

- Under the menu item Advanced Authentication Policies click on No Authentication Policy

- Click on Add under Select Policy

- Enter the following:
- Click on Add next to Action

- Now configure the Authentication SAML Server with the following parameters:
Note !
If the configuration is to be done automatically, the checkbox next to Import Metadata must be selected and the previously copied App Federation Metadata Url must be stored in the window that then appears.

- Click on More and edit the following settings
- Confirm the entry with Create

- Check the entries again and click Create

- Under Policy Binding controls the inputs and changes the following:

- If the Authentication Policy is connected click on Continue and Done


In order to complete the configuration on the NetScaler, we only need to bind the newly created SAML Authentication Policy to our Gateway Virtual Server.
- To do this, we navigate to NetScaler Gateway > Virtual Servers

- Select the gateway vServer previously configured for FAS in StoreFront (e.g. https://citrix.deyda.net = UG_VPN_ug_10.0.0.8_443) and click Edit

- Unbind all connected LDAP or RADIUS authentication policy from the vServer
- Click on the policies under Basic Authentication (e.g. 1 LDAP Policy)

- Select the policies and click Unbind

- Confirm the window with Yes

- Check that neither a policy is connected in Basic Authentication nor in Advanced Authentication

- On the right side, click Authentication Profile under Advanced Settings

- Click on Add under Authentication Profile

- Enter a name (e.g. saml_auth_profile) under Create Authentication Profile and click on Click to select under Authentication Virtual Server

- Select the previously created Authentication Virtual Server (Azure-AD_auth_VS) and click Select

- Confirm the entry by clicking on Create

- Click on OK and on Done

- Navigate to NetScaler Gateway > Global Settings to delete the single sign-on domain

- Click on Change Global Settings

- Delete the possible entry under Single Sign-on Domain.

- If necessary, the policies of the Gateway vServer must also be adjusted for Single Sign-on Domain


Important !
If NetScaler 13.1 (currently tested with build 12.51) is used and the Single Sign-on Domain field under Global Settings is filled, the configuration currently does not work.
Under NetScaler 13.1 the Override Global is not stored in the Session Policy if the field is empty. But this is needed for the SAML Auth.

Therefore, the Global Setting must be cleaned up under 13.1 and it must be checked that no Override Global has been stored under Single Sign-on Domain in the Session Policies of the Gateway vServer. Please check previously for any other gateway vServers, that the Global Setting for this field is not required and if so, enter it in the connected Session Policies.
- Furthermore, the policies of the Gateway vServer must also be adjusted regarding Session Time-out
- This value must be smaller than the timeout value of the connected store in StoreFront

CLI Command
The certificate must first be uploaded to the NetScaler appliance via WinSCP. It must be stored under the path /nsconfig/ssl/.
|
1 2 3 4 5 6 7 8 9 |
add ssl certKey <idp-certificate-name> -cert <idp-certificate> add authentication vserver <auth-vserver-name> SSL bind ssl certkey <auth-vserver-name> <wildcard-certificate-name> add authentication samlAction <saml-auth-server-name> -samlIdPCertName <idp-certificate-name> -samlRedirectUrl <redirect-url-idp> -samlSigningCertName <wildcard-certificate-name> -logoutURL <logout-url-idp> -samlIssuerName <issuer-name-idp> -samlRejectUnsignedAssertion OFF -signatureAlg RSA-SHA256 -digestMethod SHA256 add authentication Policy <auth-policy-name> -rule HTTP.REQ.IS_VALID -action <saml-auth-server-name> bind authentication vserver <auth-vserver-name> -policy <auth-policy-name> -priority 100 -gotoPriorityExpression END unbind vpn vserver <gateway-name> -policy <ldap-policy-name> unset tm sessionparameter -ssoDomain unset vpn sessionAction <gateway-session-profile-name> -ntdomain |
Example:
|
1 2 3 4 5 6 7 8 9 |
add ssl certKey SAML_Azure_AD -cert Citrix_FAS.cer add authentication vserver Azure-AD_auth_VS SSL bind ssl certkey Azure-AD_auth_VS Wildcard201904 add authentication samlAction saml_auth_server -samlIdPCertName SAML-Azure-AD -samlRedirectUrl https://login.microsoftonline.com/.../saml2 -samlSigningCertName Wildcard201904 -logoutURL https://login.microsoftonline.com/.../saml2 -samlIssuerName https://citrix.deyda.net -samlRejectUnsignedAssertion OFF -signatureAlg RSA-SHA256 -digestMethod SHA256 add authentication Policy saml_auth_pol -rule HTTP.REQ.IS_VALID -action saml_auth_server bind authentication vserver Azure-AD_auth_VS -policy saml_auth_pol -priority 100 -gotoPriorityExpression END unbind vpn vserver UG_VPN_SAML-UG -policy 10.0.0.4_LDAP_pol unset tm sessionparameter -ssoDomain unset vpn sessionAction AC_OS_10.0.0.8 -ntdomain |
If the authentication policies are not known. These can be found out as follows. The session policies are also displayed.
|
1 |
show vpn vserver <gateway-name> |
Example:
|
1 |
show vpn vserver UG_VPN_SAML-UG |

Now we know the session policies and have to find out the session profiles for the adjustment.
|
1 |
show vpn sessionaction |

Citrix Federated Authentication Service (FAS)
Certificate Authority
Next, a PKI environment must be created, if there is no Microsoft Enterprise PKI in the domain. Go for this on the machine that should receive this role. In my example, it is the domain controller itself.
- For this we go to the Server Manager and click Add Roles and Features

- Click through the wizard to the point Server Roles and select the item Active Directory Certificate Services
- Confirm the selection with Add Features

- Then click Next in the Server Roles, Features and AD CS tab

- Under the heading Role Services you select the following points:

- If pop-up windows with additional features appear, you also confirm these with Add Features

- Complete the installation with Install

- Now select the Notifications item in Server Manager
- Click on Configure Active Directory Certificate Services

- In the following configuration, the default settings can be confirmed with Next

- In the following window select Certification Authority and confirm with Next

- Define your configuration and confirm the individual points with Next
- Configuration used by me:


- Confirm the settings with Configure

Now the domain controller must be issued a certificate of the local CA.
- To do this, open the MMC on the domain controller

- Click on File and Add / Remove Snap-in …

- Now click on Certificates and on Add

- In the following window select Computer account and confirm it with Next

- Finally, close the window with OK

- Right-click on Personal and then on All Tasks > Request New Certificate…

- In the Certificate Enrollment window, select your Active Directory Enrollment Policy and click Next


- Select Domain Controller Authentication and confirm this with Enroll


Citrix Federated Authentication Service
Now we can install and configure the FAS server. In my example, I install the FAS Part on the StoreFront server.
- For this mount the ISO of your Virtual Apps & Desktops version and start autoselect.exe
- Then start the installation by clicking on Federated Authentication Service in the following window

- Click on “I have read, understand, and … ” and confirm it with Next

- Now confirm the following default settings with Next

- And click Next again

- Start the installation with Finish


- You may have to restart your server

- To perform the basic configuration of the FAS through the GPO, copy the ADMX / ADML files from the specified path of your FAS server (C:\Program Files\Citrix\Federated Authentication Service\PolicyDefinitions)

- Add them to the PolicyDefinitions Store of your Active Directory

- Create a new one or edit an existing GPO, which will be activated on the following systems:

- In the GPO go to the path:
|
1 |
Computer Configuration \ Policies \ Administrative Templates \ Citrix Components \ Authentication |
- Enter your FAS server in Federated Authentication Service

- Update your local GPOs on the FAS server by running gpupdate /force in the CMD

- Then check the registry that the required entry has been written to the system:
|
1 |
HKEY_LOCAL_MACHINE \ SOFTWARE \ Policies \ Citrix \ Authentication \ UserCredentialService \ Addresses |
Or / And
|
1 |
HKEY_LOCAL_MACHINE \ SOFTWARE \ WOW6432Node \ Policies \ Citrix \ Authentication \ UserCredentialService \ Addresses |

- Now start the Citrix Federated Authentication Service Tool with the “run as administrator” parameter

- Under Connect to FAS Server you can see the list of FAS servers entered via GPO
- Select the desired server and click OK

- The following window configures the FAS
- Click on Deploy in the frame Deploy certificate templates

- Click on OK, so that the configuration is carried out automatically, in the background

- After successful setup, a green tick appears next to the frame
- Then click on Publish in the second frame (Set up a certificate authority)

- Under Certificate Authority, select your CA configured / created for FAS (e.g. DC01.deyda.local\CA-DEYDA) and click OK

- Upon successful setup, also a green tick appears next to the second frame
- Now click on Authorize at the third frame Authorize this service

- Here select your CA and click OK.

- Next to the third frame now appears a blinking circle, because the certificate request must be approved

- Reconnect to the server with the FAS CA and open the Server Manager
- In Server Manager, click Tools > Certification Authority

- In the Certification Authority console, click on Pending Requests

- There you right click on the request of your FAS server (e.g. DEYDA \ CTX01) and click on All Tasks > Issue

- Thereafter, the certificate appears under Issued Certificates

The now-approved certificate normally expires in 2 years.
Therefore, it is recommended to include this certificate in the monitoring so that you renew the certificate before it expires.
Here are the PowerShell commands to get the expiration date (Replace CTX01.deyda.local with your FAS server).
|
1 2 |
Add-PsSnapin Citrix.Authentication.FederatedAuthenticationService.V1 Get-FasAuthorizationCertificate -FullCertInfo -address CTX01.deyda.local |
- After approving, also a green tick appears next to the third frame

- Now click on Create in the frame Create a Rule

- Click on Next to create the default rule

- In the Template section select Citrix_SmartcardLogon and click Next

- In the Certificate authority section select your FAS CA (e.g. DC01.deyda.local\CA-DEYDA) and click Next

- Select Allow in-session use if you want to support double hop scenarios
- Click on Next

- Under Access control click on Manage StoreFront access permissions

- In the following window you delete the default group Domain Computers

- Then add your StoreFront servers and give them the Assert Identity (Allow) right
- Confirm this with OK

- Confirm with Next

- Under Restrictions you can define the user and the VDA for which certificate authentication via FAS should be allowed

- Click on Manage user permissions
You can restrict the users who can log in to Citrix via SAML. By default, the group Domain Users is stored here, which can stay that way.

- Click on Manage VDA permissions
Under Manage VDA permissions you can narrow down the list of Citrix Workers to which you can log in via SAML. By default this stands on Domain Computers, which can stay that way.

- After everything is defined click on Next
- In the last window on Create

- Now all points have a green tick

StoreFront
Now we configure the StoreFront server so that it can talk to the FAS server.
- Go to your Citrix StoreFront console and make a note of your stores you want to configure for FAS (e.g. Store)

- Start PowerShell as administrator on a StoreFront server

- Execute the following commands in PowerShell (change the store path in line 2 to your store name):
|
1 2 3 4 5 6 |
Get-Module "Citrix.StoreFront.*" -ListAvailable | Import-Module $StoreVirtualPath = "/Citrix/Store" $store = Get-STFStoreService -VirtualPath $StoreVirtualPath $auth = Get-STFAuthenticationService -StoreService $store Set-STFClaimsFactoryNames -AuthenticationService $auth -ClaimsFactoryName "FASClaimsFactory" Set-STFStoreLaunchOptions -StoreService $store -VdaLogonDataProvider "FASLogonDataProvider" |

- If you want to deactivate this again, e.g. for troubleshooting, you can do this with the following command in an administrative PowerShell (Adjust the line 2):
|
1 2 3 4 5 6 |
Get-Module "Citrix.StoreFront.*" -ListAvailable | Import-Module $StoreVirtualPath = "/Citrix/Store" $store = Get-STFStoreService -VirtualPath $StoreVirtualPath $auth = Get-STFAuthenticationService -StoreService $store Set-STFClaimsFactoryNames -AuthenticationService $auth -ClaimsFactoryName "standardClaimsFactory" Set-STFStoreLaunchOptions -StoreService $store -VdaLogonDataProvider "" |
- Now open the Citrix StoreFront console again
- Click on Manage Authentication Methods in the panel on the right side

- Enable Pass-through from Citrix Gateway, if it is not enabled

- Then click on the gear on Pass-through from Citrix Gateway and on Configure Delegated Authentication

- In the following window, check the box next to Fully delegate credential validation to Citrix Gateway
- Click OK two times to close the windows

- Click, back in the main window of the StoreFront console, on Manage Citrix Gateways

- In Manage Citrix Gateways, you add a new Gateway or edit an existing one to connect to your NetScaler which will later be used as Service Provider

- In my case, I edited an existing Gaeway via Edit
- Configured the following under Authentication Settings:
- Confirm the settings with Finish

Important !
The callback address must also be resolved correctly in the internal DNS.

- In the main menu of the StoreFront console, click on Configure Remote Access Settings

- Check that the item Allow users to access only resources delivered through StoreFront (No VPN tunnel) is activated

Delivery Controller
The XML Trust must still be activated on the Delivery Controller if this is not already activated.
- To do this you start a PowerShell as administrator on a Delivery Controller
- Now run the following command
|
1 2 |
asnp citrix.* Set-BrokerSite -TrustRequestsSentToTheXmlServicePort $true |

Microsoft Azure Multi-Factor-Authentication with Conditional Access
You can find more detailed background information on this topic here.
Conditional Access
- First, we sign up with an administrative account in Azure Portal
- Click on Azure Active Directory > Security

- Click on Conditional Access

- Click on Named locations

- Create a new location based on the IP with a click on IP ranges location (via Countries location you can define whole countries to which you can then set special permissions)

- Configure the following for the workers
- Name (e.g. Azure Worker)

- Click on the +

- Mark as trusted location (Checked)
- Click on Create

- Click under Policies on New policy

- In the new window, enter a Name for the policy (e.g. External MFA)
- Click on Users and groups
- Click under Include on All users

- Under Exclude click on Users and Groups
- Click on Select excluded users
- On the following window select the users that should not receive an MFA message, like the Break Glass User and the Sync Accounts
- Confirm with Done

- Click on Target resources
- Click on Select apps and select the previously created Enterprise App (e.g. Citrix FAS)
- Confirm with Done

- Click on Conditions > Locations
- Click under Configure on Yes

- Click under Exclude on Selected locations
- Select the previously created Location (e.g. Azure Worker)
- Confirm with Done

- Click under Access controls on Grant
- Select Grant access and Require multi-factor authentication
- Confirm with Select

- Click under Enable policy on On
- Confirm with Create

Convert users from per-user MFA to Conditional Access based MFA
Before the following script works, a connection to Azure AD must be established. Execute the following lines.
|
1 2 3 4 5 |
# Install and Connect to Azure AD Install-Module MSOnline $Msolcred = Get-credential Connect-MsolService -Credential $MsolCred |
Save the following code into a PS1 file and execute it to swivel the MFA method.
|
1 2 3 4 5 6 7 8 9 10 11 12 13 14 15 16 17 18 19 20 21 22 23 24 25 26 27 28 29 30 31 |
# Sets the MFA requirement state function Set-MfaState { [CmdletBinding()] param( [Parameter(ValueFromPipelineByPropertyName=$True)] $ObjectId, [Parameter(ValueFromPipelineByPropertyName=$True)] $UserPrincipalName, [ValidateSet("Disabled","Enabled","Enforced")] $State ) Process { Write-Verbose ("Setting MFA state for user '{0}' to '{1}'." -f $ObjectId, $State) $Requirements = @() if ($State -ne "Disabled") { $Requirement = [Microsoft.Online.Administration.StrongAuthenticationRequirement]::new() $Requirement.RelyingParty = "*" $Requirement.State = $State $Requirements += $Requirement } Set-MsolUser -ObjectId $ObjectId -UserPrincipalName $UserPrincipalName ` -StrongAuthenticationRequirements $Requirements } } # Disable MFA for all users Get-MsolUser -All | Set-MfaState -State Disabled |
List of configured MFA users
|
1 2 |
# Identify registered users Get-MsolUser -All | where {$_.StrongAuthenticationMethods -ne $null} | Select-Object -Property UserPrincipalName | Sort-Object userprincipalname |
List of unconfigured MFA users
|
1 2 |
# Identify non-registered users Get-MsolUser -All | where {$_.StrongAuthenticationMethods.Count -eq 0} | Select-Object -Property UserPrincipalName | Sort-Object userprincipalname |
Authentication App
We now log in to MFA Setup with our test user to configure the Authentication App on the mobile device.

If the test user does not yet have a configured second factor, the following message appears.
The configuration can be started with Next.

- In the next window, select the type of the Second Factor (e.g, Mobile App)
- To simplify the configuration, you select to receive notifications for verification and click Next
- In the following window, a QR code is displayed, with which the Authentication App can be configured
- Open the Authenticator app on your device
- Click on the + symbol to add another account
- Select Business or School Account in the Accounts window

- With the following menu item Scan QR code you can scan the existing QR Code

- Now the test user is displayed in the account list

- In the browser you can confirm the configuration of the MFA service with Next and Finish
Result
If we now open the FQDN of the gateway (https://citrix.deyda.net) via browser.

We will be forwarded directly to Azure-AD and can authenticate ourselves there.


We get our Citrix resources listed and can start them.


Troubleshooting
Lessons learned from the field.
Cannot start app / Cannot start desktop
The user gets his resources displayed, but cannot start them and only gets the error message:
Cannot start app…

Cannot start desktop…

If this message appears only after FAS has been implemented, the usual suspects (machines not in Maintenance Mode, VDA is not registered, machines are shut down and so on), must be checked later.
Scenario 1
Checking the event log on the StoreFront shows the following.
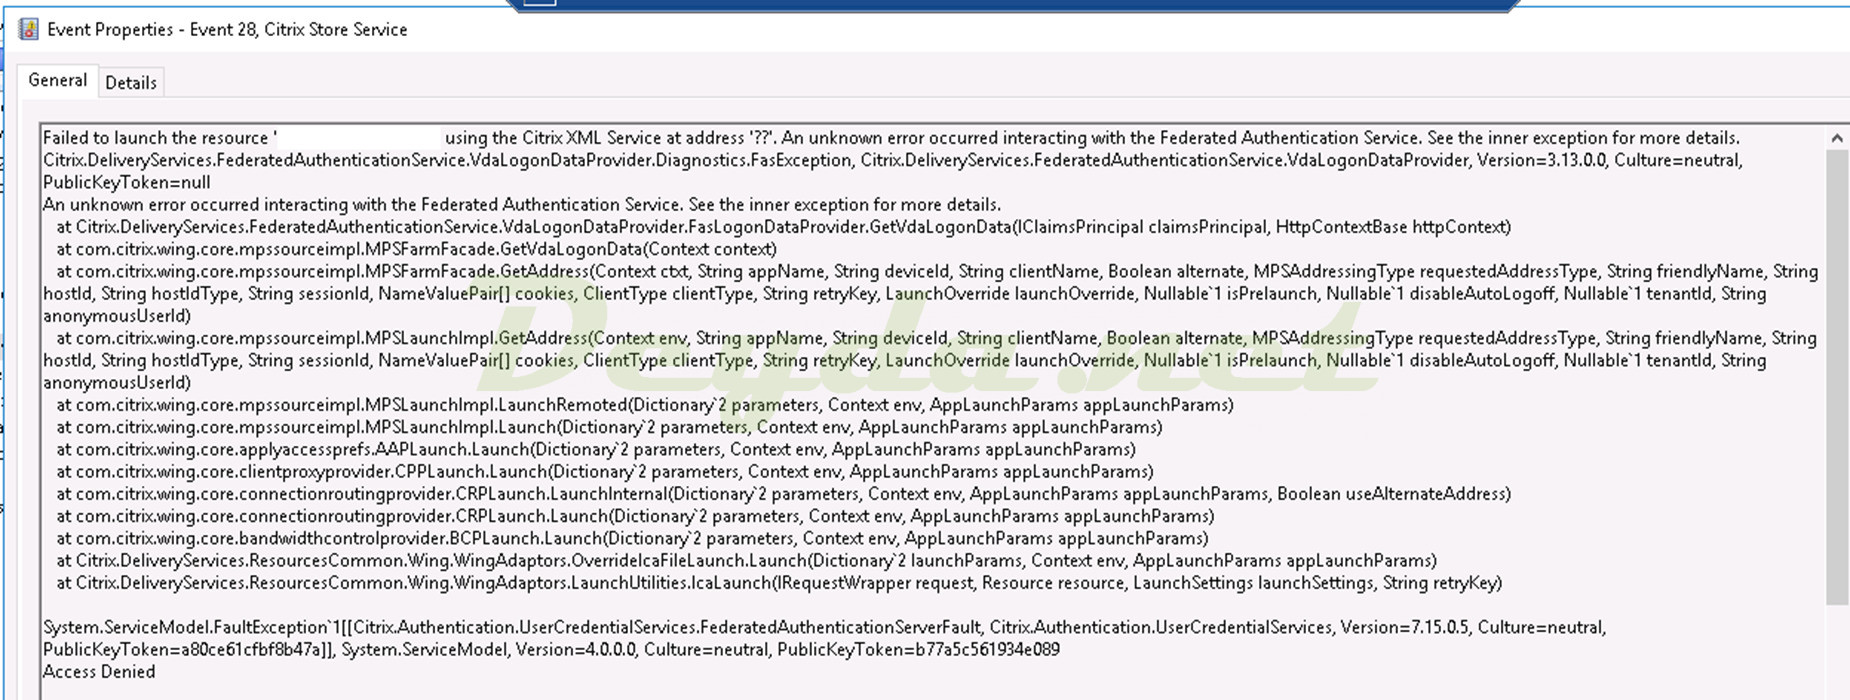
Event 28 is generated when the application is started on the StoreFront server.
Failed to launch the resource ‘ ‘ using the Citrix XML Service at address ‘??’.

An unknown error occurred interacting with the Federated Autentication Service.

Citrix.Authentication.UserCredentialServices.FederatedAuthenticationServerFault,…Access Denied

This error message indicates a discrepancy in the FAS rule configuration. Mostly a different rule name is distributed than the one used in the FAS.
To check this, check the set Rule Name in the GPO or directly on the StoreFront in the registry.
To do this, go to the registry path and check the contents of DefaultRole:
|
1 |
HKEY_LOCAL_MACHINE\SOFTWARE\Policies\Citrix\Authentication\UserCredentialService |

Compares the rule name with the one stored in FAS under User Rules.

In my example, there was a discrepancy (GPO was configured to myRule and FAS to default) and this needs to be adjusted by editing the GPO and running a gpupdate /force on the StoreFront.
Scenario 2
If no event with ID 28 can be found on the StoreFront, the event log on the FAS server should be checked next.
![[S104] Server [] failed to assert UPN [] (UPN not allowed by role [default])](https://i0.wp.com/www.deyda.net/wp-content/uploads/2021/12/image-6.png)
Event 104 is generated when the application is started on the FAS server.
[S104] Server [] failed to assert UPN [] (UPN not allowed by role [default])
This indicates a misconfiguration in the specified FAS rule (here default). The StoreFront server (here SF1) is not authorized to make requests to the FAS server. But also the user could not be authorized in the FAS Rule.
To check this, check the settings in the FAS console regarding Manage StoreFront access permissions and Manage user permissions.
Here you can see that the StoreFront servers are not stored.
Expands the list of deposited machines with the required StoreFront servers.
Also check the Manage user permissions.
If the user or one of its groups is listed here and set to Deny, this should be corrected.
The request is not supported
The user gets his resources displayed and only gets the error message on the resource:
The request is not supported

Since we get to the VDA and there the message appears, check the event log on the target VDA.

Scenario 1
If event 3 occurs in the event log with the following content.
A Kerberos error message was received: on logon session

Error Code: 0x10 KDC_ERR_PADATA_TYPE_NOSUPP

This indicates that the domain controllers are missing the Domain Controller Authentication Certificate and/or the Kerberos Authentication Certificate. In the figure below you can see how it has to look like.

To do this, connect to the domain controller and check whether the above-mentioned certificates are available in the computer context. If not, simply add them so that the smart card logon works.

Szenario 2
If event 9 occurs in the event log.
The client has failed to validate the domain controller certificate for . The following error was returned from the certificate validation process: A certification chain processed correctly, but one of the CA certificates is not trusted by the policy provider.

Check the registry on the affected VDA at:
|
1 |
HKEY_LOCAL_MACHINE\SOFTWARE\Microsoft\EnterpriseCertificates\NTAuth\Certificates |
Normally, several CAs should be stored here.

If this is the case, export the internal CAs in DER format.

Then import the individual files on the VDA with the following command.
|
1 |
certutil -enterprise -addstore NTAuth <CA files> |
Then check via the registry that the CAs are now listed.

AADSTS50020: User account
After authentication, the user receives the following message.
AADSTS50020: User account


We can’t get to the Citrix farm and so check the Azure AD under Sign-in logs.


We find there the error code 50020, which matches the displayed error of the user.
Invalid username or password or Inval….

From the error message it is obvious that the entered user data does not match the Active Directory.
Scenario 1
Checking the user principal name (UPN) in the local Active Directory.

The local UPN (here User01@deyda.local) does not match the data entered and stored in Azure AD (here User01@deyda.net). This must be adjusted.
Scenario 2
If the UPN matches, check the Session Policies of the Citrix Gateway vServer, which is responsible for SAML authentication.

The Single sign-on domain must be empty in the session policies so that the correct username can be passed.
The user name or password is incorrect
The user gets the error message after starting the resource on the VDA.
The user name or password is incorrect

Since we get to the VDA and the message appears there, check the event log on the target VDA. There we find again the event ID 3 in the system log.

Event 3 declares:
A Kerberos error message was received: on logon session
Error Code: 0x3e KDC_ERR_CLIENT_NOT_TRUSTED

This indicates that the Certificate Revocation List has expired or is not accessible.
To check this, start the URL Retrieval Tool and check the CRLs from the Active Directory.

Ensures that the CRLs are up-to-date and provided (see figure).

Temporarily, the CRL query can also be disabled by entering the following registry key on the VDA.
Important !!!!
Remove this after testing.
|
1 2 3 4 5 |
HKEY_LOCAL_MACHINE\System\CurrentControlSet\Control\LSA\Kerberos\Parameters Value Name: UseCachedCRLOnlyAndIgnoreRevocationUnknownErrors Value Type: DWORD Value Data: 1 |
Cannot complete your request
The user gets the error message after being connected for a while.
Cannot complete your request

This indicates that the timeout in StoreFront is set shorter than in NetScaler Gateway vServer.
To do this, adjust the timeout in either StoreFront or NetScaler so that the value in NetScaler is less than that in StoreFront (here StoreFront 20 minutes and Citrix Gateway 15 minutes).

The StoreFront Store settings are accessible in the specific store under Manage Receiver for Web Sites.
You cannot login using smart card
The user gets the error message after trying to access the gateway page. Mostly when the user has previously authenticated against another Azure service.
You cannot login using smart card

To solve this, the script.js file must be customized on all StoreFront servers. This can be found under C:\inetpub\wwroot\Citrix\<Store Name>Web\custom.

Insert the following line at the end of the file and save it.
|
1 |
CTXS.allowReloginWithoutBrowserClose = true |

Afterwards the IIS must be restarted. Start a CMD and execute the following command:
|
1 |
iisreset |

This must be executed on all StoreFront servers, on which the store connected in Citrix Gateway is stored.
Renewing the SAML certificate
Since my first article on this topic, is now almost 3 years ago, I have also come to the point of what needs to happen to the SAML certificate from the Azure AD Enterprise App when it expires. This needs to be reissued in Azure AD and then replaced in the NetScaler SAML Server Actions.
Azure Active Directory
To renew the certificate, this must be requested and downloaded under Enterprise application in Azure Active Directory.
- For this go to Azure Portal
- In the Azure Navigation Panel, click on Azure Active Directory
- In Azure Active Directory, click on Enterprise applications > All applications

- Search for the previously created application (e.g. Citrix FAS) and click on it.

- In the Enterprise application click on Single sign-on or on 2. Set up single sign on
- Under SAML Signing Certificate (area 3) the expiration date of the certificate for the service provider (NetScaler) can be checked (here 2.6.2022)
- Click on Edit

- In the following window click New Certificate to create a new certificate

- Now a new certificate with the status n/a appears under the existing certificate
- Click Save to finally create the certificate (Then a certificate thumbprint is also displayed)

- After confirming the new certificate via Save, the thumbprint appears and the status changes to Inactive

- To activate the new certificate, click on the three dots (…) in the row of the new inactive certificate
- In the following drop down window click on Make certificate active

- A message follows that with the confirmation of this message, the old certificate is deactivated and no SAML authentications can be signed with this certificate any longer
Important!
The certificate can also be downloaded before activation and imported / activated in NetScaler. I only go through system by system in these instructions.

- The new certificate is now active and the old one can no longer be used

- Now the new certificate can be downloaded via Certificate (Base64)

- After the certificate is downloaded, it has been renamed to Citrix FAS New, for better clarity.

NetScaler
Finally, the newly downloaded certificate must also be imported on the NetScaler.
- Open the admin web interface of the NetScaler and navigate to Traffic Management > SSL > Certificates > Server Certificates
- Click Install there to import the new certificate
- Enter the following and confirm with Install

- The installed certificate is not found under Server or Client Certificates, but under Unknown Certificates.

- Then navigate to Security > AAA – Application Traffic > Policies > Authentication > Advanced Policies > Actions > SAML Actions to edit the existing SAML server action (here saml_auth_server)

- Now replace the certificate under IDP Certificate Name and select the newly downloaded one (here Citrix FAS NEW).

Nice write up.
Kudos for this great content you are sharing!
Thanks for sharing this superb documentation. May I ask you to add two cents about the necessary ports that need to be open?
Thx for your response….i will do it 🙂
Thanks for the step by step configuration. It’s just what we need. But… (there’s always a but), can I configure it without Conditional Access?
Of course. Just dont configure it in Azure AD 🙂
Thanks for the nice article! Question: is it also possible to do SSO, so that when a user is already logged on to his Azure AD joined device, Netscaler doesn’t prompt for credentials anymore?
This should work as long as you have a PRT on the system and the MS pages on the correct site-to-zone assignment list.
http://www.deyda.net/index.php/en/2019/07/18/activation-of-azure-ad-seamless-single-sign-on/
http://www.deyda.net/index.php/en/2021/05/18/why-a-windows-server-2019-vdi-should-be-hybrid-azure-ad-joined/
Unfortunately this doesn’t work. From the same client I can logon to https://portal.azure.com and https://portal.office.com without entering any credentials, but as soon as I go to our Citrix portal I’m required to enter my UPN and password every time.
with just the ldap polcy everything works.
When I follow your guide to setup azure ad saml: I get “Cannot complet your request” any idea?
and on the citrix delivery server I got the following errors:
An authentication attempt was made for user ‘o365@xxxx.ch’ with realm context ” and result: Failed (Windows error code: -1073741715) “FASLogonDataProvider”.
CitrixAGBasic-Single Sign-On failed because the credentials could not be verified for the following reason: Failed.
The provided credentials were:
User: o365@xxxx.ch
Domain:
A CitrixAGBasic login request has failed.
Citrix.DeliveryServicesClients.Authentication.AG.AGAuthenticatorException, Citrix.DeliveryServicesClients.Authentication, Version=3.23.0.0, Culture=neutral, PublicKeyToken=null
Authenticate encountered an exception.
at Citrix.DeliveryServicesClients.Authentication.AG.AGAuthenticator.Authenticate(HttpRequestBase clientRequest, Boolean& passwordSupplied)
at Citrix.Web.AuthControllers.Controllers.GatewayAuthController.Login()
System.Net.WebException, System, Version=4.0.0.0, Culture=neutral, PublicKeyToken=b77a5c561934e089
The remote server returned an error: (403) Forbidden.
Url: https://127.0.0.1/Citrix/workplaceAuth/CitrixAGBasic/Authenticate
ExceptionStatus: ProtocolError
ResponseStatus: Forbidden
at System.Net.HttpWebRequest.GetResponse()
at Citrix.DeliveryServicesClients.Utilities.HttpHelpers.ReceiveResponse(HttpWebRequest req)
at Citrix.DeliveryServicesClients.Authentication.TokenIssuingClient.RequestToken(String url, RequestToken requestToken, String primaryToken, String languages, CookieContainer cookieContainer, IEnumerable1 acceptedResponseTypes, IDictionary2 additionalHeaders)
at Citrix.DeliveryServicesClients.Authentication.AG.AGAuthenticator.Authenticate(HttpRequestBase clientRequest, Boolean& passwordSupplied)
I think you have a problem with your username. The IDP delivers something that the FAS dont know or expected
Thank you for the detailed manual. It works fine for us except that, after user signs in and the resource list is displayed, when trying to launch a virtual app the users get prompted to logon on again on windows server. Do you know how avoid this re-authentication?
Everything is set up as you described in AzureAD, Netscaler, StoreFront and Delivery Controllers, except that we don’t have any FAS server. There are no errors on the event viewer on any of the storefront or delivery controllers.
Hi Guido, exactly for that you need the FAS 🙂
Will this also work in the workspace app and not the webportal ?
Yep this should also work for the Workspace App 🙂
Hello,
I can add the account with my MFA but afterwards he keeps prompting to singn in with the normal workspace app username and password fill.
And this doesnt work and also no idea how this will give the MFA prompt
When going trough webbrowser everything works but when using workspace app i get this error:
A request was sent to service ‘Authentication Service’ that was detected as passing through a gateway. This service is configured with the gateways [9fd064a5-1b25-4180-9934-f050823b4d35], but none of these matched the request. Request details:
X-Citrix-Gateway: ctxportal.climagroup.be
X-Citrix-Via: ctxportal.climagroup.be
And everything is ok in the netscaler gateways. Any idea what could be this ?
Have you edited and adjusted the session policies for receiver access ? I ran through it again yesterday with my instructions and it works for me.
yes i changed everything.
The strange thing is when adding the account i get 2 times this popup and when i press cancel 2 times it also works and the popups are not coming back anymore.
Hey Manuel,
great blog, I have used it many times to configure SAML Auth with Azure AD and it always worked like a charm 🙂
One additional question occured for me, as I am trying to enhance the whole configuration for further usecases:
is it possible to extract (A)AD Groups from the SAML Assertion sent back to NetScaler? I have looked around a bit and found several possibilities with nFactor group extract, followed by SAML. I am trying to get everything done with only SAML and without nFactor. So far I could tell the Azure Enterprise App to send back the groups claim and configured the http://schemas.microsoft.com/ws/2008/06/identity/claims/groups as Attribute1 (and Group.Name in Attributes, but I think that doesn’t do anything). This resulted in getting back the Group ID within the assertion, seen in aaad.debug but I cannot find a way to transform these IDs to an actual Group Name which the NetScaler can use to evaluate AAA Groups (for example). Within Azure I can only select “Group ID” and not a Group Name in the claims. Is there something I am missing?
Thanks a lot in advance!
best regards
Thank you very much for the great instructions. My question, can this also be implemented without a Netscaler Gateway? We would like to set up MFA authentication (with Entra ID MFA) for our internal storefront access. Thank you very much for your support
Hello Manuel,
Thanks for the great article.
I have a question: I have a customer with Citrix Gateway Standard 25 VPX. If I choose the “unlicensed features,” I have the ability to set up AAA Application Traffic and Virtual Authentication Server. Would that be enough to set up MFA with FAS on the NetScaler, or does the customer need the Platinum or Enterprise licensing?
Hi Kristiyan,
yes this should work with Version 13.1 also with Advanced Licenses.
https://www.citrix.com/content/dam/netscaler/documents/data-sheet/netscaler-edition-comparison-matrix.pdf